
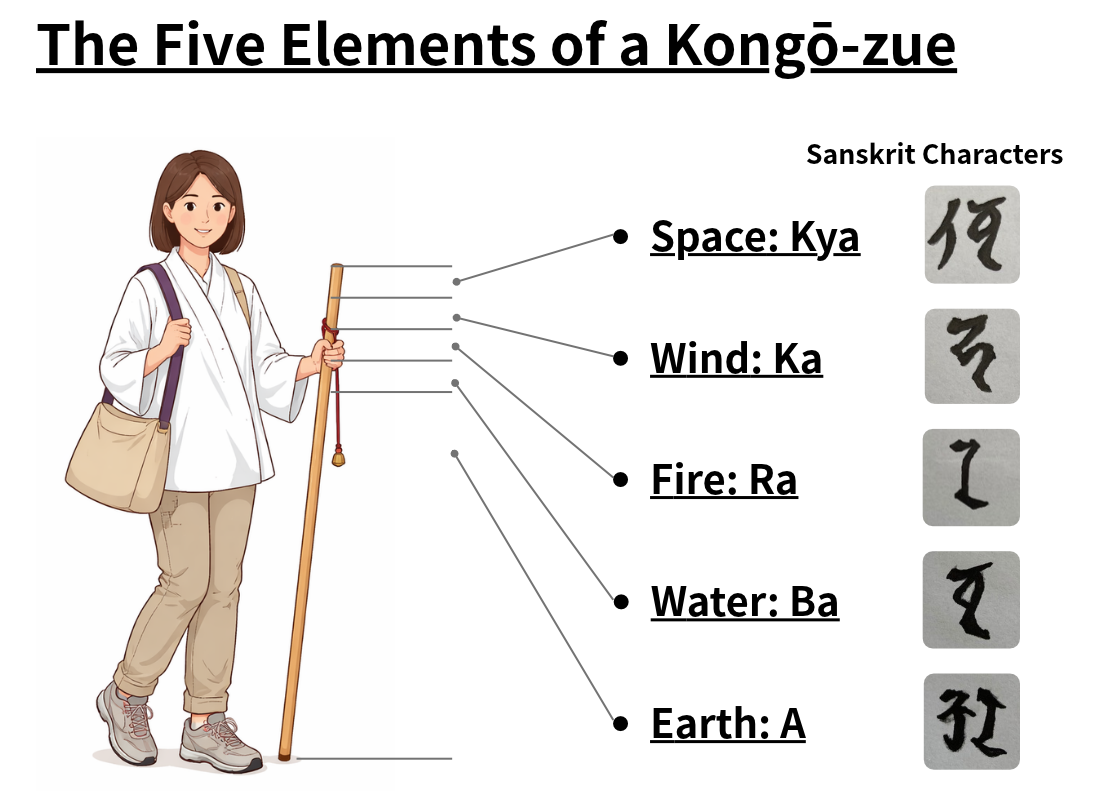
A Kongō-zue (pilgrimage staff) can be made at home using materials available at a hardware store.
I made my own Kongō-zue and used it during my Shikoku pilgrimage. Making your own staff gives you a special attachment to it, and you can customize its length and thickness to suit your body. The process is relatively simple, and if you have the necessary tools, you can finish it in about an hour.
In this article, I’ll explain the materials you need, how to make your own Kongō-zue, and the advantages and disadvantages I discovered through actual use.
Materials and Tools Needed to Make a Kongō-zue
First, gather the materials and tools you need from a hardware store.
What You’ll Need
- Wooden stick (square or round)
- Metal file
- Saw
- Pencil
- Ruler
- Sumi ink, permanent marker, or another writing tool
You can use either a square or round wooden stick. If this is your first time making a Kongō-zue, a square stick is recommended because it is easier to shape the five symbolic sections at the top.
You can also use a permanent marker instead of traditional sumi ink to write the characters on the staff.
How to Choose the Right Wooden Stick
It’s best to visit a hardware store and choose your wooden stick in person.
Choose a Stick That Is Slightly Longer Than Necessary
A good guideline for the length of a Kongō-zue is somewhere between shoulder and chest height. Try holding the stick and aim for a length that allows your elbow to bend naturally.
Walking the Shikoku pilgrimage involves covering long distances, so the tip of your staff will gradually wear down as it touches the ground. The full walking pilgrimage around Shikoku is approximately 1,200 km (745 miles), so choosing a slightly longer stick from the start is a good idea.
Make Sure the Stick Is Thick Enough
Some sections of the pilgrimage route include steep mountain paths and uneven terrain. Since you may need to lean on your staff for support, avoid choosing one that is too thin.
For a square stick, a thickness of at least 2 cm (about 0.8 inches) on each side is a reasonable starting point. However, durability depends on the type and strength of the wood. Choose a sturdy piece without cracks or weak spots around the knots.
Choose a Wood Type You Like
There are many types of wood to choose from. If you prefer a lightweight staff, hinoki (Japanese cypress) is one option.
Since you’ll be carrying the staff over long distances, its weight and how comfortably it fits in your hand are important considerations. Choosing wood with a color and grain that appeal to you can also make your handmade staff feel more special.
Advantages of Making Your Own Kongō-zue
1. You’ll Have a One-of-a-Kind Pilgrimage Staff
The biggest appeal of making your own Kongō-zue is that you can go on your pilgrimage with a staff that is uniquely yours.
Over time, exposure to sunlight, rain, and wind changes the color of the wood, giving it more character. The handle gradually becomes more comfortable in your hand, and even the scratches picked up on mountain trails become reminders of your pilgrimage.
2. You Can Customize It to Fit Your Body
Commercially available Kongō-zue staffs may be too long or too thick for your hands.
When you make your own, you can adjust the length and thickness to suit your height and hand size. This is especially beneficial if you find standard pilgrimage staffs too long.
3. You Can Save Money
Buying a piece of wood from a hardware store allows you to make a Kongō-zue at a relatively low cost.
If you already have the necessary tools, you won’t need to spend much on additional equipment. Making your own staff is a good option if you want to keep the cost of preparing for your pilgrimage down.
4. It’s Easier to Recognize Your Own Staff
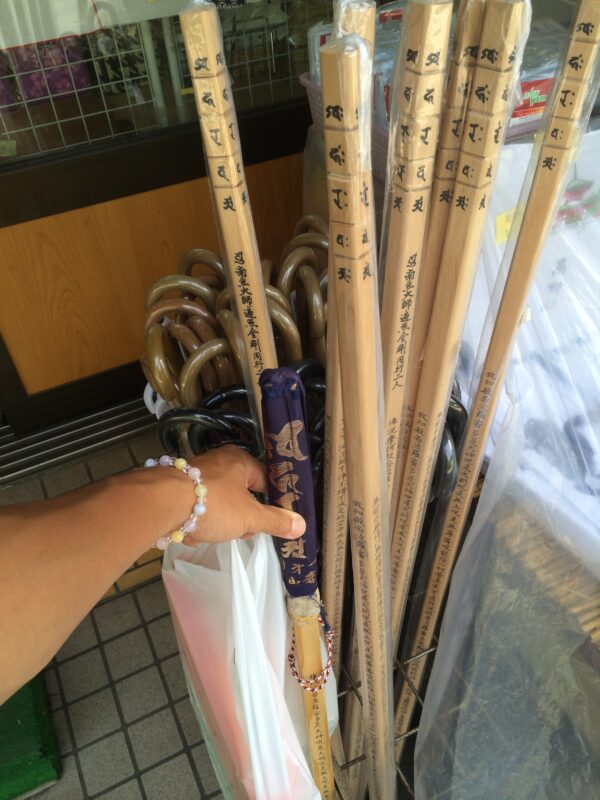
When visiting temples, you may place your Kongō-zue alongside those belonging to other pilgrims.
If several similar-looking staffs are lined up together, it can be difficult to tell which one is yours.
A handmade staff has its own distinctive features, such as the wood grain, shape, and lettering, making it easier to recognize. This also helps reduce the risk of accidentally taking someone else’s staff.
Disadvantages of Making Your Own Kongō-zue
There are no major disadvantages to making your own Kongō-zue, but it does take some time and effort.
You’ll need to choose the materials, adjust the length, shape the five symbolic sections, and add the appropriate lettering. This can be a little inconvenient if you want a staff that’s ready to use right away.
Another consideration is transporting the staff to your starting point. Since a walking pilgrimage involves covering long distances, carrying your staff during your journey to Shikoku can sometimes be a burden.
If you don’t want to spend time preparing your staff or prefer to buy what you need after arriving, purchasing a ready-made Kongō-zue is also a good option.
How to Make a Kongō-zue
Now, let’s go through the process of making your own Kongō-zue.
Step 1: Decide on the Length and Cut the Wood
First, cut the wooden stick to a length that suits you.
A good guideline is somewhere between shoulder and chest height. Hold the stick and adjust the length until your elbow bends naturally.
A Kongō-zue is treated with great respect as a manifestation of Kōbō Daishi (Kūkai). For this reason, there is a traditional belief that cutting the staff should generally be avoided.
If you are making your own, complete any cutting and shaping before writing the Sanskrit characters or other inscriptions on the staff.
Step 2: Carve the Five-Part Symbol at the Top
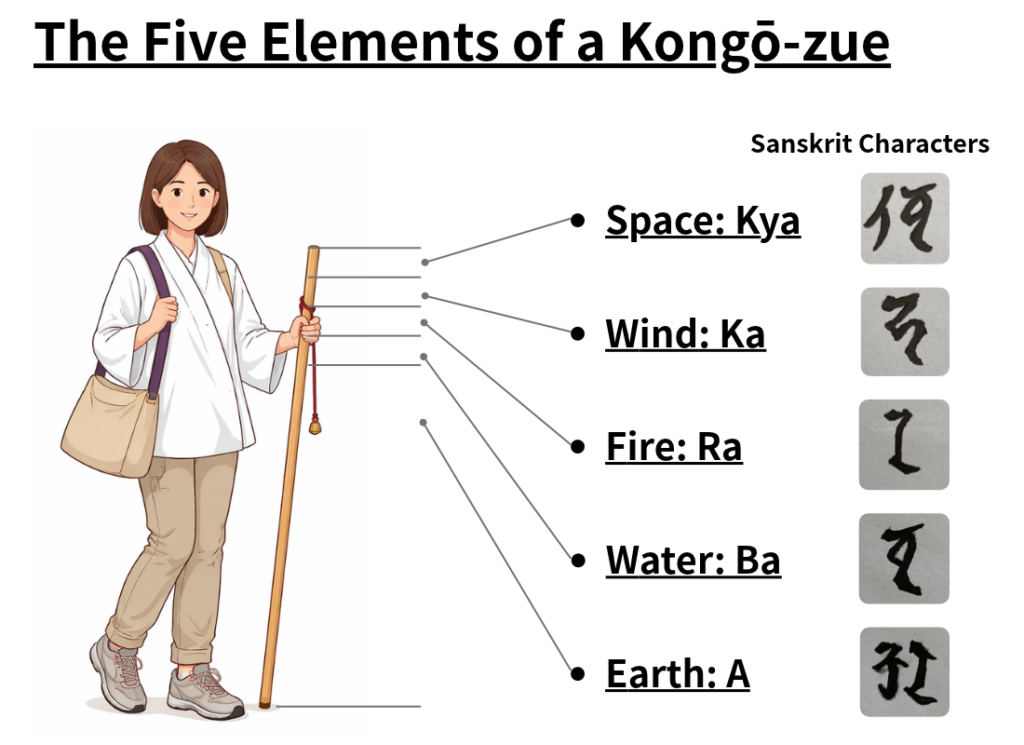
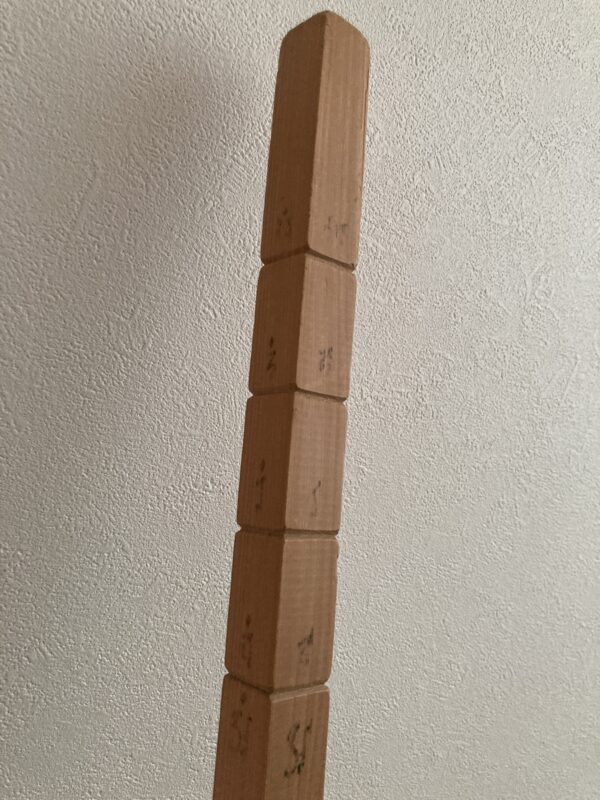
The upper part of a Kongō-zue features the five-part symbol representing the Five Great Elements: kū (space), fū (wind), ka (fire), sui (water), and chi (earth).
To create this shape, make four shallow cuts near the top of the staff, dividing it into five sections. Use the corner of a metal file to shape the grooves. Marking the positions with a pencil beforehand will help you achieve an even, balanced finish.
One important tip: if you cut the staff to adjust its length, it is best to position the cut end at the bottom. This keeps the cut less noticeable and gives the finished staff a cleaner appearance.
Step 3: Add Sanskrit Characters and Other Inscriptions
Finally, add the Sanskrit characters and other inscriptions to your staff.
The Sanskrit syllables corresponding to the five elements are traditionally written from top to bottom as Kya, Ka, Ra, Ba, and A.
Kongō-zue staffs used for the Shikoku pilgrimage may also bear inscriptions such as Namu Daishi Henjō Kongō and Dōgyō Ninin.
To achieve a neat finish, sketch the lettering in pencil first, then trace over it with sumi ink or a permanent marker.
The placement and form of the inscriptions and Sanskrit characters can vary depending on the tradition or the particular staff. If you want to follow a specific traditional style, check with a temple or a shop specializing in pilgrimage supplies.
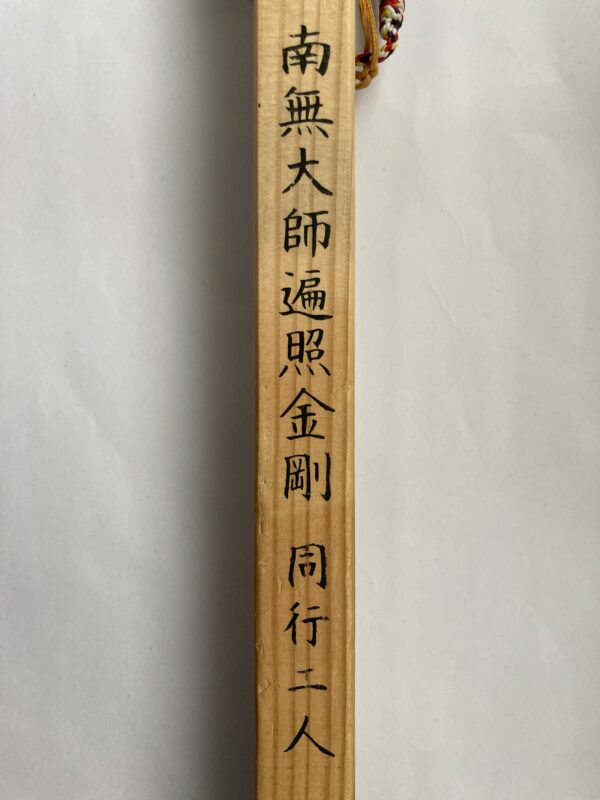
Important: Make sure the length and shape of the staff are finalized before adding the Sanskrit characters and other inscriptions, so you won’t need to do any further cutting afterward.
Conclusion: Enjoy Your Pilgrimage with a Handmade Kongō-zue
You can make your own Kongō-zue using materials readily available at a hardware store.
The process is relatively straightforward, and if you have the necessary tools, you may be able to complete your staff in about an hour.
Making your own allows you to customize the length and thickness to suit your body. Another special benefit is that the wood develops more character the longer you use it.
If you’re planning to begin the Shikoku pilgrimage, why not try making a Kongō-zue of your own?
Related Articles
What Is a Kongozue? The Sacred Walking Staff of the Shikoku Pilgrimage
Pilgrimage Staff



Comments